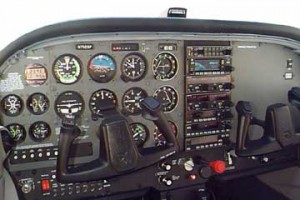
 I teach students to do preflight in 3 steps:
- cockpit
- exterior
- fuel
Preflight should actually begin as you are walking out to the plane – does it look right? Is it leaning to one side, or sitting funny on the ramp? Do you see any fluid under the engine cowling or by the main landing gear? Then immediately upon reaching the plane, check fuel levels – that way you can call for fuel and they can come and fuel it up while you do the rest of the preflight.
NOTE: the specifics in this series apply to Cessna 172 aircraft, as that is what I instruct in most – in any case, always use the Pilot Operating Handbook (POH) for your aircraft to confirm that you have not missed anything on your preflight!
Step 1 really starts after that. Turn on just the battery side of the master switch, and listen for the electric turn coordinator gyro to start spinning up… it will sound like a computer fan. Then turn on all the electric switches (taxi light, landing light, nav lights, strobe lights, beacon, and pitot heat). Check your ammeter or load meter (load meter should show a definite load, and ammeter should show a discharge and your “low voltage” light should be on, if you have one.
Now do a quick walk around, checking all these lights. Yes, even if you are flying during the day. This is part safety and part courtesy. Even during the day, these lights can make you easier to see for traffic avoidance, so you will want to know whether they are working or not. Courtesy-wise, you’ll want to “squawk” any light that isn’t working so that any pilot who has that plane scheduled to fly at night can be notified or can be switched to a different plane – one that is “legal” for night flight with all the lights working. I know I would be unhappy as a renter if I showed up to fly at night and no one had checked the lights all day. I’ve been in exactly this situation, and I would have rather stayed home than made the trip to the airport just to not be able to fly that night.
The last check at this point is the pitot heat. CAREFULLY touch the pitot tube after your walk-around… It should be getting warm. You should always be careful here, because the pitot heat gets HOT if it is working, and could be very hot depending on the length of time your walk-around took.
Once pitot heat is confirmed, turn off all the switches in the cockpit except the master battery. Turn ON the avionics master switch, and listen for the heat fan (if equipped). Wait for any GPS or other electronics to go through their full “boot up” before turning the avionics master back off.
Now drop the flaps, check the fuel gauges to make sure they are working, and once the flaps are fully deployed, turn off the master battery switch and take out the control lock.
Make note of anything that isn’t working, and talk to your instructor about whether (and how) you can still fly legally and safely with inoperative equipment.
Don’t forget to check for AROW (these things are required for the plane to be considered airworthy):
A – Airworthiness Certificate
R – Registration
O – Operating Limitations (Pilot’s Operating Handbook [POH] & placards)
W – Weight & Balance (should be in the aircraft-specific POH in the plane)
Stay tuned for step 2 of the preflight – exterior!
What would you add to the interior / cockpit check? Check it off your list by adding a comment below!
Andrew Hartley is a certificated flight instructor in Columbus, Ohio.
Preflight Series:
Preflight Step 1: The Cockpit Check
Preflight Step 2: Exterior (Wing)
Preflight Step 2: Exterior (Tail)
Preflight Step 2: Exterior (Engine)
Preflight Step 3: Fuel